
Exporting and Packaging the Pivot Tables and Dashboards
Exporting and Packaging the Pivot Tables and Dashboards
-
Navigate to the User Portal. If you are still viewing the dashboard from the previous section, you can return to the User Portal by clicking Home.
-
From the User Portal page, click Menu > Management Portal.
If you do not see this option, you are currently logged in as a user without direct access to the InterSystems IRIS Business Intelligence development tools. In this case, log out of the Management Portal and then log in as an authorized user.
-
Click Analytics > Admin > Folder Manager.
The system then displays the Folder Manager.
-
Scroll to the Tutorial folder, which should look something like this:

The column on the right indicates the InterSystems IRIS® data platform user who created these items; you may see different values there.
-
Click the check box to the left of Sample Dashboard. The left area of the page now lists the pivot tables used by this dashboard:
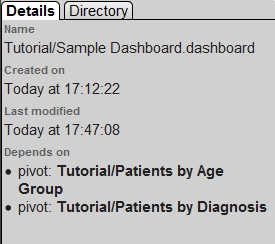
Both of these pivot tables are in the same folder as the dashboard itself, which is not required.
-
Click the check box to the left of the two newer pivot tables as well.
-
For Directory, type the name of an existing directory to which you have write permission.
-
Click Export.
The system then writes three files to that directory.
You could use these files as a package for the items you have defined, but in the next set of steps, we will use a more convenient approach.
-
In an IDE, create a new class called Tutorial.DashboardsAndPivots. The class should extend %DeepSee.UserLibrary.ContainerOpens in a new tab.
-
In the new class, add an XData block named Contents, as follows:
XData Contents [ XMLNamespace = "http://www.intersystems.com/deepsee/library" ] { <items> </items> } -
Save the new class.
-
Copy the dashboard and pivot table definitions from your exported files into this XData block:
-
Use a text editor to open the dashboard file (Tutorial-Sample_Dashboard.xml), which looks as follows:
<?xml version="1.0" encoding="UTF-8"?> <dashboard xmlns="http://www.intersystems.com/deepsee/library" folderName="Tutorial" name="Sample Dashboard" ... ... </dashboard> -
Copy the contents of this file, starting with the second line and ending at the end of the file. That is, do not copy the first line, which is the XML declaration.
-
Paste the copied text into the XData block between <items> and </items>. Now you should see this:
XData Contents [ XMLNamespace = "http://www.intersystems.com/deepsee/library" ] { <items> <dashboard xmlns="http://www.intersystems.com/deepsee/library" folderName="Tutorial" name="Sample Dashboard" ... ... </dashboard> </items> } -
Use a text editor to open one of the pivot table files, which has a similar structure (with <pivot> instead of <dashboard>).
-
Copy the contents of this file, , starting with the second line and ending at the end of the file.
-
Paste the copied text into the XData block between </dashboard> and </items>. Now you should see something like this:
XData Contents [ XMLNamespace = "http://www.intersystems.com/deepsee/library" ] { <items> <dashboard xmlns="http://www.intersystems.com/deepsee/library" folderName="Tutorial" name="Sample Dashboard" ... ... </dashboard> <pivot xmlns="http://www.intersystems.com/deepsee/library" folderName="Tutorial" name="Patients by Age Group" ... ... </pivot> </items> }Note:You could instead insert the copied text between <items> and <dashboard>. The order of the items has no effect on anything.
-
Repeat the preceding steps with the other pivot table file.
-
Save the class definition.
-
-
Return to the Folder Manager and refresh the page.
This clears any selections you may have made.
-
Click the check box next to each of the three items in the Tutorial folder.
-
Click Delete and then click OK to confirm.
-
In an IDE, compile the class you just created.
When you do this, the system imports the dashboard and pivot table definitions contained in that class.
-
Return to the Folder Manager and refresh the page. Notice that the tutorial dashboard and pivot tables are available again.
You can include as many dashboards and pivot tables as needed in a container class like this, and you can have multiple container classes. There are no requirements to organize the dashboards and pivot tables in any particular way in these container classes. For example, you do not need to place the pivot tables in the same container class as the dashboards that use them. There is also no requirement to create these container classes at all.