
Creating the Subject Areas
Creating the Subject Areas
To create the subject areas, do the following:
-
In the Architect, click New.
-
Click Subject Area.
-
For Subject Area Name, type Patient Set A
-
For Base Cube, click Browse and select Tutorial
-
For Class name for the Subject Area, type Tutorial.SubjectA
-
Click OK.
The system creates the subject area and saves the class.
You should see the following:
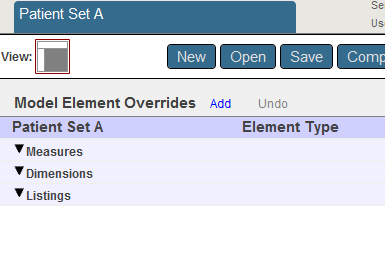
In the Architect, there is no user interface for defining a filter. Instead it is necessary to type a suitable filter expression or to copy and paste one from the Analyzer.
-
In a separate browser tab or window, access the Analyzer and then do the following:
-
Expand HomeD.
-
Drag and drop ZIP Code to the Filters box in the Pivot Builder area. This adds a filter selection field to the bar directly above the pivot table.
-
In that filter selection field, click the search button and then select 32006, 32007, and 36711.
Click the check mark.
This action filters the pivot table.
Important:Do not drag and drop 32006, 32007, and 36711 separately to the Pivot Builder area’s Filters box. Instead drag the level as described and then select the members.
-
Click the Query Text button
 .
.The system then displays a dialog box that shows the MDX query that the Analyzer is using:
SELECT FROM [Patients] %FILTER %OR({[HOMED].[H1].[ZIP Code].&[32006],[HOMED].[H1].[ZIP Code].&[32007],[HOMED].[H1].[ZIP Code].&[36711]}) -
Copy the text after %FILTER to the system clipboard.
-
Click OK.
-
-
In the Architect, click the line labeled Patient Set A.
-
In the Detail Pane, paste the copied text into Filter.
%OR({[HOMED].[H1].[ZIP Code].&[32006],[HOMED].[H1].[ZIP Code].&[32007],[HOMED].[H1].[ZIP Code].&[36711]}) -
Click Save and then click OK.
-
Compile the subject area.
-
For the second subject area, repeat the preceding steps, with the following changes:
-
For Subject Area Name, type Patient Set B
-
For Class name for the Subject Area, type Tutorial.SubjectB
-
Repeat the preceding steps with the other two ZIP codes. So, for Filter, use the following:
%OR({[HOMED].[H1].[ZIP Code].&[34577],[HOMED].[H1].[ZIP Code].&[38928]})
-