
Adding an Explicit Filter Control
Adding an Explicit Filter Control
To add a control to filter one or more widgets, add a control as described earlier in this page and configure it as follows:
-
Location — Select either Widget (the default) or Dashboard.
-
Target — If this control is going to automatically refresh the display, do one of the following:
-
Leave this option blank, if you want to refresh only this widget. This is the default.
-
Specify * to refresh all widgets.
-
Specify the name of the widget to refresh (use the value given in the Widget Name option for that widget).
-
-
Action — Select one of the following:
-
Apply Filter sets the filter and automatically refreshes the display.
-
Set Filter sets the filter but does not refresh the display.
-
-
Filter — Select the filter for this control to use:
-
For a pivot table created in the Analyzer, the system lists all levels available in the same subject area.
If there are any named filters in the subject area, the list include the item Named Filters. If you select this option, the user will be able to select any one of those named filters.
-
For a KPI, the system lists all filters defined in the KPI.
-
For a production business metric, the list includes Instance (the instance to display), MaxHistory (the number of historical points to display for the properties that specify AUTOHISTORY), and Properties (the metric property to display).
-
-
Type — Select auto, dropdown, or searchBox.
-
Control Label or Icon — Optionally type the text that you want to display above the control. Or select an icon to display next to the control.
-
Read Only — Optionally select this to prevent the users from changing the filter. In this case, the purpose of the filter is to indicate how the data is filtered. Either provide a default value or pass a filter value via the dashboard URL. See Accessing Dashboards from Your Application.
-
Value Required — If the user must specify a value for this filter, enable the Required option. Also specify a value for Default Value so that the dashboard always has a value for this filter.
-
Control Tooltip — Optionally type a tooltip to display when the user hovers the cursor over the control.
Specifying a Default Value
You may optionally type a value into Default Value.
Alternatively, click the magnifying glass. The system displays the following dialog box:
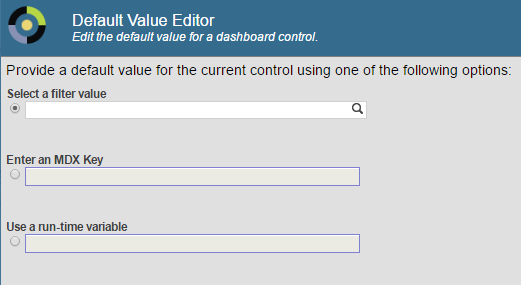
Here do one of the following:
-
Click the magnifying glass under Select a filter value and select a value in the resulting dialog.
-
Type a value in the Enter an MDX Key field. See the table after this list.
-
Select a value from the Use a run-time variable drop-down list, which lists all available runtime variables. (For details on creating these, see Implementing InterSystems Business Intelligence.)
Then click OK.
If you select a runtime variable, it is shown in the Default Value field with an at sign (@) at the beginning. For example: @DefaultZipCode
The system assumes that the filter value is a member key rather than a member name. In most cases, the member key and member name are the same. For information on seeing the member key, see Finding the Key for a Member.
Also, if a user accesses the dashboard via a URL, any filter values in the URL take precedence over the default value specified in this control.
If you type a value into the Enter an MDX Key field, use one of the following forms:
| Scenario | Expression That Returns This Value |
|---|---|
| A single member | "&[keyval]" where keyval is the key for the member. See Key Values in the InterSystems MDX Reference. |
| A range of members | "&[keyval1]:&[keyval2]" |
| A set of members | "{&[keyval1],&[keyval2],&[keyval3]}" |
| All members of the level except for a specified single member | "%NOT &[keyval]" |
| All members of the level except for a specified subset | "%NOT{&[keyval1],&[keyval2],&[keyval3]}" |