
Defining Listing Groups
This page describes how to use the Listing Group Manager, which enables you to define listings that are not contained in any Business Intelligence cube definition.
Also see Accessing the Business Intelligence Samples.
Introduction to Listing Groups
A listing group is a special kind of class that defines multiple listings, which are supplementary in the sense that they are defined outside of the cube definition. These can be any kind of listing supported by InterSystems IRIS Business Intelligence. You can give users access to the Listing Group Manager so that they can define additional listings without modifying the cube definitions.
A listing group is meant to be a convenient container; it also specifies the following pieces of information that apply to all listings in the group:
-
The cube or cubes in which the listings can be used.
-
The resource that secures each listing (by default).
A listing group cannot override listings defined elsewhere.
A listing group is either disabled or enabled. If a listing group is disabled, its listings are not available to any cubes. If a listing group is enabled, and if it has been compiled, its listings are available to the specified cubes.
The listings in a listing group are not available until the listing group has been compiled.
The listing group can have an associated resource, so that only users with access to that resource can edit the listing group.
Note that the Analyzer and the Dashboard Designer do not display the listing groups themselves, but rather simply display all available listings. End users do not have any information about where or how any given listing is defined.
Accessing the Listing Group Manager
The Listing Group Manager enables you to define listing groups and the listings in them. To access the Listing Group Manager:
-
Click the InterSystems Launcher and then click Management Portal.
Depending on your security, you may be prompted to log in with an InterSystems IRIS® data platform username and password.
-
Switch to the appropriate namespace as follows:
-
Click the name of the current namespace to display the list of available namespaces.
-
From the list, click the appropriate namespace.
-
-
Click Analytics, click Tools, and then click Listing Group Manager.
If there is a listing group in this namespace, the Listing Group Manager displays the last listing group that you looked at.
If there is no listing group in this namespace, the Listing Group Manager prompts you to create one. Enter the following details and then press OK:
-
Listing Group Name — Logical name of the listing group. You can edit this later.
-
Listing Group Class Name — Class name of the listing group, including the package.
-
Listing Group Description — Optional description of the listing group. You can edit this later.
Or click the X in the upper right of the dialog box.
-
The Listing Group Manager displays a listing group as shown in the following picture:
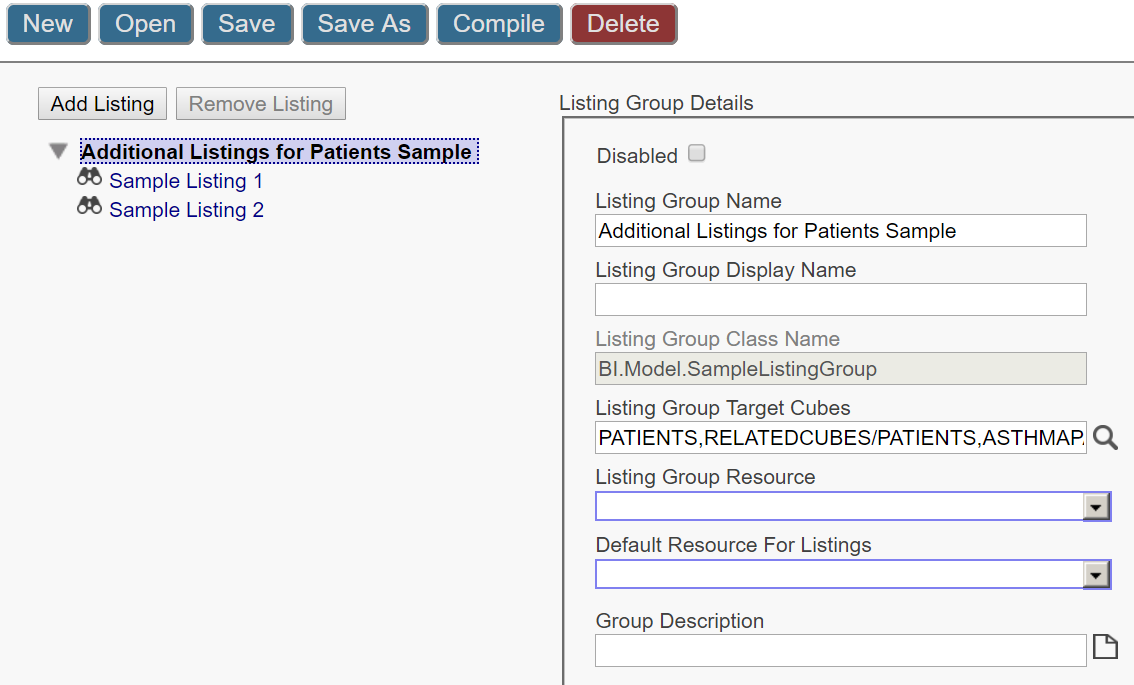
The left area displays the logical name of the listing group (Sample Listing Group in this example), followed by the names of the listings in this listing group. You can collapse and expand this part of the display.
The right area displays details for the item that you have selected on the left, either the listing group or one of the listings defined in it.
Adding a Listing Group
In the Listing Group Manager, to add a listing group:
-
Click New.
The system then displays a dialog box.
-
Enter the following details:
-
Listing Group Name — Logical name of the listing group. You can edit this later.
-
Listing Group Class Name — Class name of the listing group, including the package.
-
Listing Group Description — Optional description of the listing group. You can edit this later.
-
-
Press OK.
The Listing Group Manager then creates and saves the class and displays the new listing group. The left area now displays something like the following:
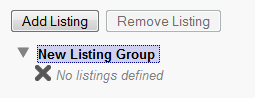
Now you can modify details of the listing group (which affect all the listings it contains), as described in the following subsection. Or you can add listings, as described in the later in this page.
Modifying Details of the Listing Group
In the Listing Group Manager, when you select the listing group in the left area (rather than selecting any listing contained in it), the right area displays the following details, which you can edit:
-
Disabled — Optionally click this to disable the listing group. If you do so, the listings in this listing group are not available to any cubes.
-
Listing Group Name — Specify the logical name of the listing group.
-
Listing Group Display Name — Optionally specify the display name of the listing group.
-
Listing Group Target Cubes — Select the cubes and subject areas that should be able to use the listings defined in this listing group. Notes:
-
If you select a cube, the listings will be available in that cube and in any subject areas based on that cube.
-
If you select a subject area but do not select the cube on which the subject area is based, then the listings are available only in that subject area.
The listings are available only if the listing group is enabled and compiled.
-
-
Listing Group Resource — Optionally select the resource that secures this listing group. Only users with access to this resource can edit this listing group.
For information on how resources are used, see Setting Up Security.
-
Default Resource for Listings — Optionally select the resource that, by default, secures each listing in this listing group.
-
Group Description — Optionally specify the description of the listing group.
After making changes, click either Save or Save As.
If you click Save As, the system prompts you for a new logical name, a new class name, and an optional new description.
To make the changes available to users, be sure to also compile the listing group.
Displaying a Listing Group
In the Listing Group Manager, to display a listing group:
-
Click Open.
-
Click the name of the listing group.
-
Click OK.
Now you can modify details of the listing group (which affect all the listings it contains), as described in the previous section. Or you can add, modify, or remove listings, as described later in this page.
Adding a Listing to a Listing Group
In the Listing Group Manager, to add a listing to a listing group:
-
Display the listing group.
-
Click Add Listing.
When you do, the system adds a new listing (with no details) and automatically saves the listing group at this point. The left area displays the name of the new listing; it has a name such as New Listing or New Listing1 and so on.
-
Click the name of the newly added listing.
-
Modify the name and other details shown in the right area. For information on these details, see Defining Listings.
Note that you cannot specify a listing name that already exists in the target cube or cubes; a listing group cannot override listings defined elsewhere.
-
Click Save to save the listing group. Or click Save As to create a new listing group.
-
To make the changes available to users, be sure to also compile the listing group.
Modifying a Listing
In the Listing Group Manager, to modify a listing:
-
Display the listing group that contains the listing.
-
In the left area, click the name of the listing.
-
Modify the name and other details shown in the right area. For information on these details, see Defining Listings.
-
Click Save to save the listing group. Or click Save As to save the listing group with a new name.
-
To make the changes available to users, be sure to also compile the listing group.
Removing a Listing from a Listing Group
In the Listing Group Manager, to remove a listing:
Compiling a Listing Group
In the Listing Group Manager, to compile a listing group:
-
Display the listing group.
-
If Disabled is cleared, make sure that Listing Group Target Cubes specifies at least one cube.
-
Click Compile.
The system then saves the class (if needed), compiles the class, and displays a message to indicate that it compiled the class.
After a listing group is compiled, its listings are available to the target cubes and subject areas; for details; see Modifying Details of the Listing Group.
Possible Compile Errors
The Listing Group Manager issues a compilation error in any of the following situations:
-
If there is no target cube specified. In this case, make sure that Listing Group Target Cubes specifies at least one cube and then recompile.
-
If this listing group defines listings that have the same names as existing listings in the target cubes or subject areas. In that case, modify the names of the listings in the listing group, and then recompile. (Or disable the applicable listings within the listing group and then recompile.)
-
If a target cube or subject area specifies disableListingGroups="true". The compilation error includes the text Target cube does not accept listing groups: . In this case, remove that target cube, leaving any others, and recompile. Or modify the cube or subject area so that it can accept listing groups and recompile the cube or subject area.
For information on disableListingGroups, see Reference Information for Cube Classes and Reference Information for Subject Area Classes. You cannot specify this option via the Architect.
Deleting a Listing Group
In the Listing Group Manager, to delete a listing group:
-
Display the listing group.
-
Click Delete.
-
Click OK to confirm this action.
The system then deletes the class and displays a message to indicate that it did so.
The listings in this listing group are no longer available.