Getting Started
To get started, we must complete the following pair of preliminary steps:
-
Import the sample data classes: Contact, Address, and PhoneNumber, into Caché. These classes define the Caché data displayed by Zen Contacts. See the note below for a discussion of the structure of these classes and the location of the file containing them.
-
Populate the classes with sample data.
Here are the steps for importing the classes into Caché:
-
Open Studio in the USER namespace. If Studio does not open in this namespace automatically, click File–>Change Namespace to change to USER.
-
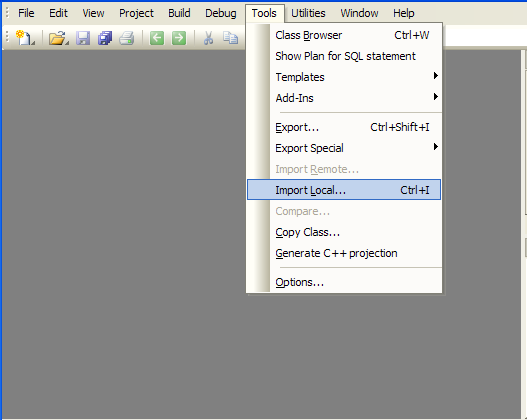
On the menu bar click Tools–>Import Local:
-
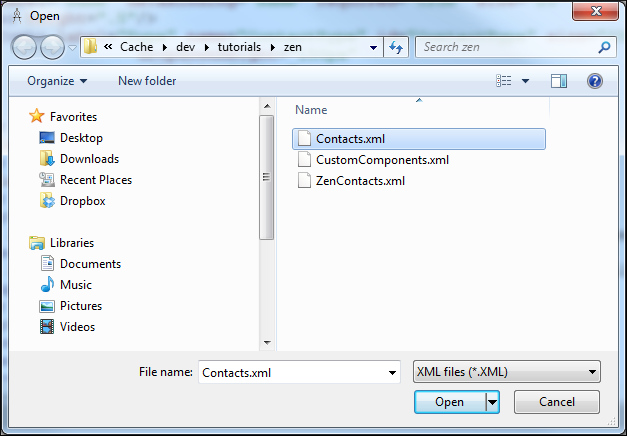
On the Open dialog click Contacts.xml and then click Open:
-
Click ZenTutorial.Contact, ZenTutorial.Address, and ZenTutorial.PhoneNumber. Verify that Compile Imported Items is selected:
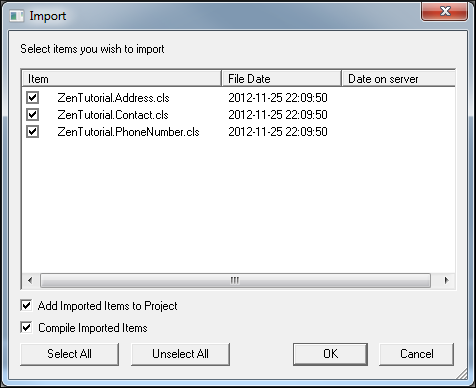
Click OK. Studio imports and compiles the classes.
Here are the steps for populating the three classes with sample data. Note that populating ZenTutorial.Contact populates ZenTutorial.Address automatically.
-
Open Terminal. If it does not open in the USER namespace, use the ZN command to change to USER. Here is an example of switching from SAMPLES to USER:
SAMPLES>ZN "USER" USER> -
Execute the following command to create 25 ZenTutorial.Contact instances:
USER>Do ##class(ZenTutorial.Contact).Populate(25) -
Execute the following command to create 75 ZenTutorial.PhoneNumber instances:
USER>Do ##class(ZenTutorial.PhoneNumber).Populate(75)
Click here here for a discussion of the Contact, Address, PhoneNumber data model.
Contacts.xml, CustomComponents.xml, and ZenContacts.xml — the completed Zen application, are in <cachesys>\dev\tutorials\zen.
You must create the ZenTutorial.Contact instances before you create the ZenTutorial.PhoneNumber instances.
To learn more about using Studio, read Using Studio.